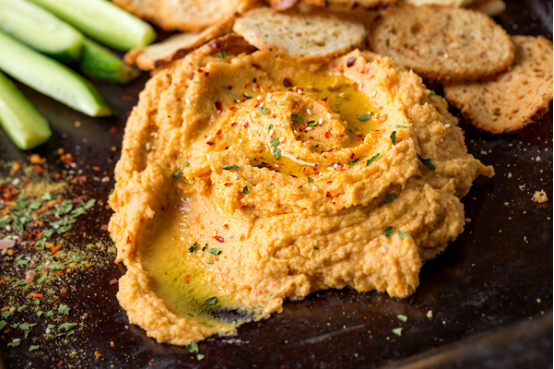
Dips are the unsung heroes of social gatherings, transforming simple chips, vegetables, and breads into culinary experiences. They are the centerpiece of the appetizer table, inviting guests to gather and share. While store-bought versions offer convenience, nothing compares to the vibrant flavor and satisfying texture of a homemade dip. This guide will take you on a journey across the globe, exploring five distinct and delicious dips: the earthy Roasted Garlic Hummus, the cool and refreshing Greek Tzatziki, the complex and savory Persian Kashk-e Bademjan, the pungent Greek Skordalia, and the ultimate American party classic, Baked Spinach Dip. Prepare to master these recipes and become the go-to host for any occasion.
Roasted Garlic Hummus: A Creamy Middle Eastern Classic
Hummus is a beloved dip with roots in the Middle East, celebrated for its smooth texture and rich, nutty flavor. While traditional hummus is fantastic, introducing roasted garlic elevates it to a new level of complexity. Roasting garlic tames its sharp bite, transforming it into a sweet, caramelized, and deeply savory element that infuses every bite of the dip.
The Magic of Roasting Garlic
The first step to an unforgettable hummus is perfectly roasting the garlic. This process is simple but crucial. To do this, slice off the top of a whole garlic head to expose the cloves. Drizzle with olive oil, wrap it loosely in aluminum foil, and bake until the cloves are soft and golden brown. This mellows the flavor, making it blend seamlessly into the creamy chickpea base without overpowering it. The resulting soft cloves can be squeezed directly from their skins into your food processor.
Core Ingredients for Authentic Hummus
Beyond the garlic, the quality of your other ingredients will define your hummus. Here is the essential list:
- Canned Chickpeas: For convenience, canned chickpeas work wonderfully. Be sure to rinse them well. For an even smoother texture, take the extra time to peel the skins off the chickpeas.
- Tahini: This sesame paste is non-negotiable for authentic hummus. It provides the signature nutty flavor and creamy consistency. Look for a high-quality, runny tahini.
- Fresh Lemon Juice: This adds brightness and cuts through the richness of the tahini. Always use freshly squeezed juice, not the bottled variety.
- Extra Virgin Olive Oil: A good quality olive oil adds flavor and helps create a silky texture. It’s also essential for drizzling on top before serving.
- Cumin: A pinch of ground cumin adds a warm, earthy note that complements the other flavors.
- Ice Water: This is the secret ingredient for an exceptionally light and fluffy hummus. Adding a few tablespoons while blending helps to whip the mixture.
Step-by-Step Preparation for the Smoothest Texture
First, combine the tahini and lemon juice in a food processor and blend for about a minute until it becomes thick and creamy. This step, known as “whipping the tahini,” is vital for a smooth final product. Next, add your roasted garlic cloves, rinsed chickpeas, olive oil, cumin, and salt. Blend until a thick paste forms. With the processor running, slowly drizzle in a few tablespoons of ice water until you reach your desired consistency—light, airy, and perfectly smooth. Garnish with a drizzle of olive oil, a sprinkle of paprika, and fresh parsley before serving with warm pita bread or fresh vegetables.
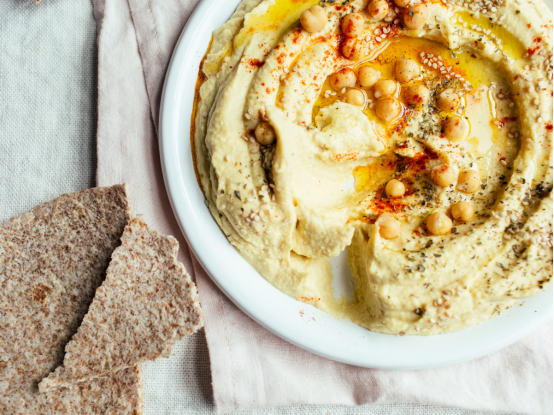
Greek Tzatziki: The Ultimate Refreshing Yogurt Dip
Tzatziki is a quintessential Greek sauce and dip known for its cool, tangy, and refreshing profile. Made from a base of thick yogurt, grated cucumber, garlic, and herbs, it’s the perfect counterpart to grilled meats, gyros, or as a standalone dip with pita and vegetables. Its simplicity is its strength, but a few key techniques ensure a perfect result every time.
The Importance of Straining Yogurt and Cucumber
The biggest enemy of great tzatziki is excess water, which leads to a thin, runny dip. To avoid this, you must remove as much moisture as possible from the two main ingredients. Start with Greek yogurt, which is already strained and thicker than regular yogurt. For the cucumber, grate it and then place it in a clean kitchen towel or cheesecloth. Squeeze firmly to wring out all the excess liquid. This step is absolutely critical for achieving a thick, creamy tzatziki that holds its shape.
Essential Components for a Zesty Tzatziki
The beauty of tzatziki lies in its fresh and simple ingredients. Here’s what you’ll need:
- Full-Fat Greek Yogurt: This provides the rich, creamy base. Avoid low-fat or non-fat versions, as they lack flavor and texture.
- Cucumber: English or Persian cucumbers are ideal as they have thin skins and fewer seeds.
- Fresh Garlic: Finely mince or grate the garlic to ensure it distributes evenly throughout the dip. Adjust the amount based on your preference for pungency.
- Fresh Herbs: Chopped fresh dill is classic and provides a distinctive, slightly sweet flavor. Some recipes also call for fresh mint.
- Lemon Juice: A splash of fresh lemon juice brightens all the flavors.
- Extra Virgin Olive Oil: A drizzle of good olive oil adds richness and a smooth mouthfeel.
Crafting the Perfect Tzatziki: A Detailed Guide
Once your cucumber is grated and squeezed dry, combine it in a bowl with the Greek yogurt, minced garlic, chopped dill, and lemon juice. Stir everything together until well-incorporated. Add a drizzle of olive oil and a pinch of salt to taste. For the best flavor, cover the tzatziki and let it chill in the refrigerator for at least 30 minutes. This allows the flavors to meld and deepen. Serve chilled, garnished with a few fresh dill sprigs and another light drizzle of olive oil.
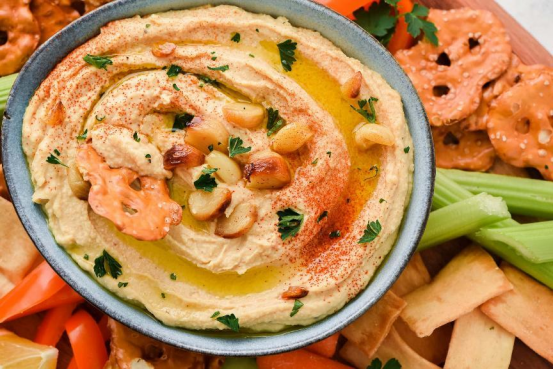
Kashk-e Bademjan: A Taste of Persian Tradition
Kashk-e Bademjan is a treasured Persian appetizer that translates to “kashk and eggplant.” This dip is a masterful blend of smoky, savory, and tangy flavors, with a uniquely rich texture. It features cooked eggplant as its star, enhanced by the distinct flavor of kashk and topped with a beautiful garnish of fried onions, garlic, and mint.
Understanding the Key Ingredients: Eggplant and Kashk
The two pillars of this dish are eggplant and kashk. The eggplant provides a creamy, slightly smoky base. It can be prepared by frying, baking, or grilling, with each method imparting a different character to the final dip. Kashk is a fermented dairy product used widely in Middle Eastern cuisine. It has a tangy, salty flavor similar to a very sharp sour cream or feta cheese and is essential for the dip’s authentic taste. It can be found in Middle Eastern grocery stores or online, often in liquid or dried form that needs to be rehydrated.
The Art of Preparing Eggplant for Maximum Flavor
To begin, peel and slice the eggplants. To reduce bitterness and prevent them from absorbing too much oil, it’s a good practice to salt the slices and let them sit for about 30 minutes, then pat them dry. The traditional method is to fry the eggplant slices in oil until they are golden brown and very tender. This develops a deep, rich flavor. Alternatively, you can roast or grill the eggplant for a smokier, healthier version. Once cooked, the eggplant is mashed with a fork or potato masher until it breaks down into a pulpy consistency.
Assembling the Rich and Savory Dip
In a pan, sauté chopped onions until they are deeply golden and caramelized. Add turmeric and sauté for another minute to bloom its flavor. Add the mashed eggplant to the pan and cook for several minutes, stirring to combine. Finally, stir in the kashk and a little water, allowing the mixture to simmer gently. The goal is a thick, scoopable consistency. Season with salt and pepper to taste, keeping in mind that kashk is already quite salty.
The Signature Garnish: Mint, Onion, and Walnuts
The garnish is not just for decoration; it’s an integral part of the dish’s flavor profile. The dip is traditionally topped with a drizzle of fried mint oil (made by briefly sizzling dried mint in hot oil), more caramelized onions, and sometimes toasted walnuts for crunch. This combination of toppings adds layers of texture and aromatic complexity that make Kashk-e Bademjan truly special.

Skordalia: The Bold and Pungent Greek Potato Dip
Skordalia is a powerful and assertive Greek dip where garlic takes center stage. Unlike the other creamy dips, its base is made from either potatoes or stale bread, which are blended with a generous amount of raw garlic, olive oil, and an acidic element like lemon juice or vinegar. The result is a thick, pungent puree with a sharp, spicy bite that is not for the faint of heart.
A Thousand-Year-Old Tradition
Skordalia has a long and storied history in Greek cuisine, traditionally served alongside fried fish (especially salt cod), grilled meats, or boiled beets. Its purpose is to provide a bold, flavorful counterpoint to milder dishes. The intensity of the garlic is a hallmark of the dish, and its preparation is a point of pride in many Greek households.
Potato vs. Bread Base: Choosing Your Texture
You have two primary options for the base of your Skordalia, each yielding a different texture:
- Potato Base: Using boiled and mashed potatoes (like Russets) creates a smoother, creamier, and more paste-like Skordalia. This is a very common and popular version.
- Bread Base: Using day-old, crustless bread that has been soaked in water and squeezed dry results in a lighter, more rustic texture. Some recipes even use a combination of bread and nuts, such as walnuts or almonds.
Step-by-Step Guide to a Powerful Skordalia
The process often begins by creating a paste with the raw garlic cloves and salt in a mortar and pestle or food processor. If using potatoes, boil them until very tender, then drain and mash them thoroughly. Add the garlic paste to the warm mashed potatoes. With the food processor running or while whisking vigorously by hand, slowly drizzle in the extra virgin olive oil in a steady stream, as if making mayonnaise. This emulsifies the mixture, making it creamy. Alternate the olive oil with splashes of lemon juice or red wine vinegar until you achieve a thick but smooth consistency. Season to taste with salt and pepper. Let it rest for a bit before serving to allow the flavors to meld.
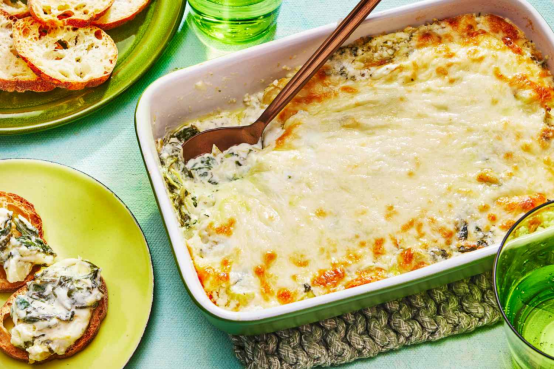
Creamy Baked Spinach Dip: The Ultimate Party Pleaser
A staple at parties and gatherings across North America, baked spinach dip is the ultimate comfort food. Served warm and bubbling from the oven, its creamy, cheesy, and savory flavor is universally loved. It’s incredibly easy to make and can be prepared ahead of time, making it a host’s best friend.
Building the Perfect Creamy Base
The foundation of any great spinach dip is its rich and creamy base. This is typically a combination of several ingredients that, when melted together, create a decadent texture.
- Cream Cheese: Provides the primary structure and tangy flavor. It should be softened to room temperature for easy mixing.
- Sour Cream or Mayonnaise: These add extra creaminess and a slight tang. Many recipes use a combination of both for the best flavor and consistency.
- Cheeses: A blend of cheeses is key. Parmesan adds a salty, nutty flavor, while mozzarella provides that irresistible gooey, stringy quality when melted.
Preparing the Spinach for Optimal Results
As with the cucumber in tzatziki, removing excess water from the spinach is the most important step. Using frozen chopped spinach is the easiest method. Thaw it completely, then place it in a kitchen towel or use your hands to squeeze out as much liquid as possible. If you fail to do this, your dip will be watery and lack concentrated flavor. If using fresh spinach, you’ll need to cook it down first, let it cool, and then squeeze it dry.
The Full Recipe: From Mixing to Baking
In a large bowl, combine the softened cream cheese, sour cream, mayonnaise, grated Parmesan, and shredded mozzarella. Add the squeezed-dry spinach, along with other flavorings like minced garlic or garlic powder, chopped water chestnuts or artichoke hearts for texture, and a pinch of salt and pepper. Stir until everything is thoroughly combined. Transfer the mixture to a baking dish, and top with a little extra cheese. Bake in a preheated oven until the dip is hot, bubbly, and golden brown on top. Serve immediately with tortilla chips, crusty bread, crackers, or vegetable sticks.
Frequently Asked Questions (FAQ)
- Q1: Can I make these dips ahead of time?
- Absolutely. Most of these dips benefit from being made ahead. Tzatziki, Hummus, and Skordalia can be made a day or two in advance; their flavors will meld and improve in the refrigerator. For the Baked Spinach Dip, you can assemble the entire dish, cover it, and refrigerate it for up to 24 hours before baking and serving.
- Q2: What are some healthy dipping options besides chips and bread?
- For a healthier alternative, serve these dips with an array of fresh vegetables. Great options include carrot sticks, cucumber slices, bell pepper strips, celery sticks, cherry tomatoes, broccoli, and cauliflower florets. Endive leaves and rice crackers are also excellent choices.
- Q3: How can I adjust the garlic level in these recipes?
- The garlic intensity is highly personal. For a milder flavor in the hummus, use fewer roasted cloves. For Skordalia and Tzatziki, which use raw garlic, you can start with one clove, taste, and add more if desired. Soaking minced raw garlic in lemon juice for 10 minutes before adding it to a dip can also help mellow its sharp bite.
- Q4: Are there vegan alternatives for the dairy-based dips?
- Yes. For Tzatziki, you can use a plant-based Greek-style yogurt made from coconut or almond milk. For the Baked Spinach Dip, vegan cream cheese, sour cream, and mozzarella-style shreds are widely available substitutes. Kashk-e Bademjan is the trickiest, as kashk has a unique flavor, but some suggest using a tangy, unsweetened vegan yogurt or a blend of vegan sour cream and nutritional yeast as a starting point.
- Q5: How long do these homemade dips last in the refrigerator?
- When stored in an airtight container, most of these dips will last for 3 to 5 days in the refrigerator. Hummus and Skordalia often last the longest. Tzatziki is best within 3 days, as the cucumber may start to release more water over time. The baked spinach dip should also be consumed within 3-4 days.